
The Honeywell T6 thermostat is a smart, programmable device designed for efficient temperature control. It offers advanced features like Wi-Fi connectivity and a user-friendly interface.
Overview of the T6 Thermostat Features
The Honeywell T6 thermostat offers a range of innovative features designed for convenience and energy efficiency. It includes programmable scheduling options, allowing users to set custom temperature plans for up to 7 days. The thermostat also supports smart home integration, enabling control via the Honeywell Home app. With Wi-Fi connectivity, users can adjust settings remotely and receive alerts for system changes. Additional features include automatic changeover between heating and cooling, adjustable differential settings, and compatibility with various HVAC systems. The T6 also boasts an intuitive touchscreen interface and energy-saving modes. Its universal compatibility ensures seamless installation with most home systems, making it a versatile choice for modern households.
- Programmable temperature scheduling
- Smart home and Wi-Fi connectivity
- Remote control via Honeywell Home app
- Automatic system changeover
- Energy-efficient operating modes
These features make the T6 thermostat a comprehensive solution for managing home comfort efficiently.
Benefits of Upgrading to the T6 Thermostat
Upgrading to the Honeywell T6 thermostat offers numerous benefits, including enhanced energy efficiency and improved home comfort. Its programmable scheduling allows for customized temperature settings, reducing energy waste and lowering utility bills. The T6 also supports smart home integration, enabling seamless control through the Honeywell Home app. With remote access, users can adjust settings from anywhere, ensuring optimal comfort upon arrival home. Additionally, the thermostat’s automatic changeover feature simplifies transitions between heating and cooling systems. Its compatibility with various HVAC systems and smart devices makes it a versatile upgrade for modern households. By installing the T6, homeowners can enjoy advanced features, convenience, and long-term energy savings, making it a worthwhile investment for any home.
- Enhanced energy efficiency
- Customizable temperature scheduling
- Smart home and remote control capabilities
- Automatic system changeover
- Compatibility with multiple HVAC systems
Pre-Installation Requirements
Ensure compatibility with your HVAC system and verify power requirements. A C-wire may be needed for proper operation. Check existing wiring and system specifications before proceeding.
- Confirm system compatibility
- Verify electrical requirements
- Check for a C-wire
- Review system specifications
Tools and Materials Needed for Installation
Before starting the installation, ensure you have the necessary tools and materials. These include a screwdriver, pliers, wire strippers, and a drill for mounting. Additional materials like a level, mounting plate, and any required adapters are essential for proper installation. A C-wire may be needed for smart features. Refer to the manual for specific requirements. Having all tools and materials ready ensures a smooth and efficient installation process.

- Screwdriver
- Pliers
- Wire strippers
- Drill
- Level
- Mounting plate
- Adapters (if required)
- C-wire (for smart features)
Understanding the Wiring Diagram
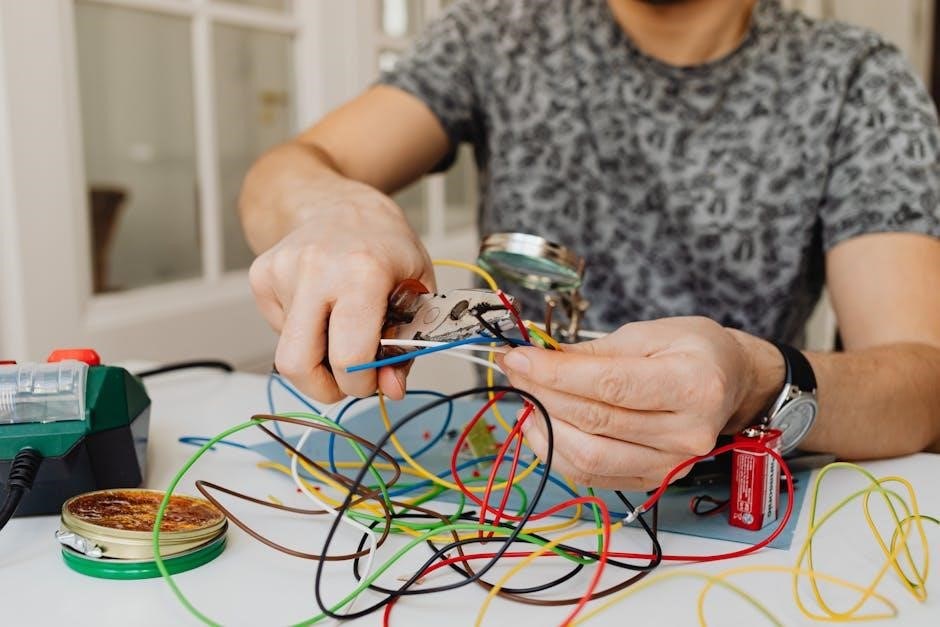
Understanding the wiring diagram is crucial for a successful T6 thermostat installation. Start by taking a photo of your existing thermostat’s wiring for reference. The wiring diagram typically includes terminals labeled R, W, Y, G, C, and others, each serving specific functions. Match these wires carefully to the corresponding terminals on the T6 thermostat. Ensure the power is off at the circuit breaker before handling any wires. If your system requires a C-wire for smart features, verify its presence or install one if necessary. Double-check all connections to avoid errors; Incorrect wiring can lead to system malfunctions or safety hazards. Refer to the official manual for detailed diagrams and instructions tailored to your setup.
Preparation Steps Before Removing the Old Thermostat
Before removing the old thermostat, ensure the power to your HVAC system is turned off at the circuit breaker or switch. Take a clear photo of the existing wiring connections for reference. Gather all necessary tools and materials, such as a screwdriver, wire strippers, and the T6 thermostat installation kit. Check if your system requires a C-wire (common wire) for smart features and verify its presence. If missing, consult the manual for alternative solutions. Ensure the new thermostat is compatible with your HVAC system type (e.g., gas, electric, or heat pump). Review the wiring diagram in the T6 manual to understand the terminal labels and their functions. This preparation ensures a smooth and safe installation process;

Physical Installation of the T6 Thermostat
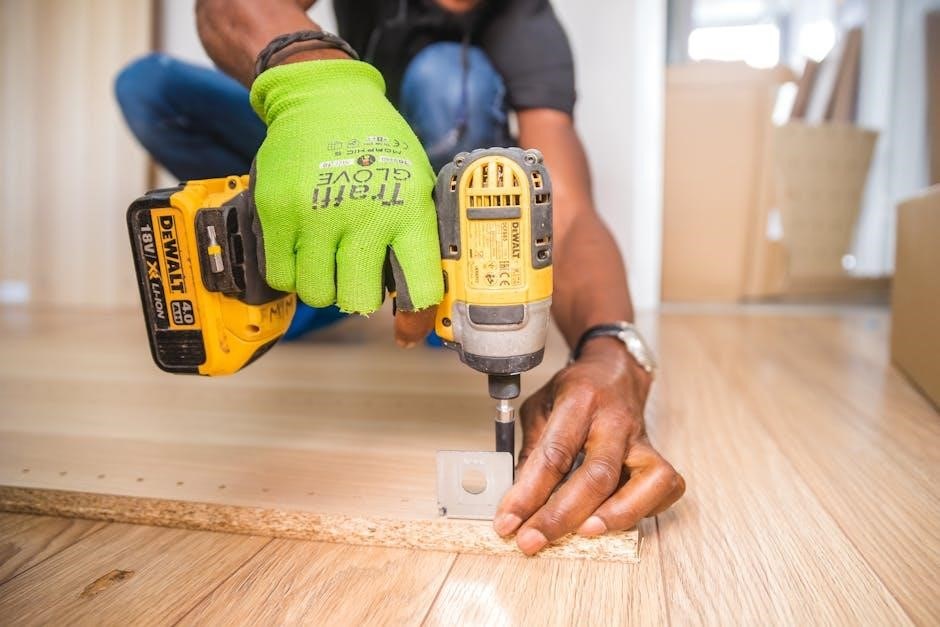
The physical installation involves removing the old thermostat, mounting the T6 using the UWP system, aligning it properly, snapping it into place, and powering on. Finally, set the time and date.
Removing the Old Thermostat Safely
Before removing the old thermostat, ensure the power to your HVAC system is turned off at the circuit breaker or fuse box to avoid any electrical hazards; Take a clear photo of the wiring connections for reference during the new installation. Gently pull the old thermostat away from the wall, taking care not to damage the wires or mounting plate. If the thermostat is screwed into the wall, remove the screws carefully. Label each wire with its corresponding terminal to ensure proper reconnection later. Once removed, set the old thermostat aside and proceed with mounting the new T6 thermostat. Dispose of the old thermostat responsibly, following local regulations.
Mounting the New Thermostat
Begin by ensuring the wall surface is clean and level. Align the UWP (Universal Wall Plate) with the mounting screws, snapping it securely into place. Use the provided screws to fasten the UWP to the wall, ensuring it is tightly anchored. If necessary, attach the optional cover plate to cover any paint gaps from the previous thermostat. Gently hang the T6 thermostat onto the UWP, pressing until it clicks into place. Ensure the thermostat is at least 1.2 to 1.5 meters above the floor and away from direct sunlight or heat sources. Once mounted, turn the power back on at the breaker box and set the time and date on the thermostat. Verify that all connections are secure before proceeding. Proper mounting ensures accurate temperature readings and optimal performance.
Connecting the Wiring to the T6 Thermostat
Before connecting the wiring, ensure the power to your HVAC system is turned off at the breaker. Refer to the wiring diagram from the internet research to identify each wire’s purpose. Match the wires to their corresponding terminals on the T6 thermostat, such as R (power), W (heat), Y (cool), G (fan), and C (common). Securely attach each wire to the correct terminal, ensuring no loose connections. If your system requires a common wire and one isn’t present, use the C-terminal adapter provided. Once all wires are connected, gently push the thermostat onto the UWP until it clicks. Turn the power back on and test the system to ensure proper functionality. If unsure, consult a licensed HVAC technician for assistance. Proper wiring is essential for safe and efficient operation. Always double-check connections before restoring power.

Configuring the T6 Thermostat Settings
Set the time, date, and temperature schedules according to your preferences. Enable smart features like geofencing and remote access via the Honeywell Home app for enhanced control.
Setting Up the Time and Date
Accurate time and date settings are crucial for scheduling and automation. After installation, power on the thermostat and navigate to the menu. Use the touch interface or buttons to set the current time, date, and time zone. Ensure the correct AM/PM format and select your location for automatic daylight saving adjustments. Save your settings to synchronize the thermostat’s clock with your preferred schedule. For optimal performance, verify the time accuracy periodically. Incorrect time settings can disrupt programmed temperature schedules, so double-check your entries. Once configured, the thermostat will maintain precise timing for all automated functions.
Programming Temperature Schedules
Programming temperature schedules on the T6 thermostat allows for efficient energy management. Start by selecting the desired schedule type: 7-day, 5-2 day, or custom. Use the touchscreen or buttons to set temperature preferences for each day, specifying times and desired temperatures for heating and cooling. Ensure consistency across weekdays and adjust weekend settings as needed; For enhanced flexibility, create unique schedules for vacations or special events. After configuring, review and save your settings to activate the schedule. Proper programming ensures optimal comfort while minimizing energy consumption. Regularly update schedules to adapt to lifestyle changes or seasonal requirements. This feature is essential for maximizing the thermostat’s smart capabilities and maintaining a comfortable home environment year-round.
Enabling Smart Features and Wi-Fi Connectivity
To enable smart features and Wi-Fi connectivity on the T6 thermostat, start by downloading the Honeywell Home app from the App Store or Google Play. Open the app and create an account or log in if you already have one. On the thermostat, navigate to the settings menu and select “Wi-Fi Setup.” Choose your home’s Wi-Fi network from the list of available options and enter the password. Once connected, the thermostat will automatically update and sync with the app. This allows remote temperature control, scheduling, and integration with other smart home systems. Ensure your router is functioning properly and the thermostat is placed in an area with stable Wi-Fi coverage for reliable performance. This connectivity enhances convenience and energy efficiency, making it easier to manage your home’s climate from anywhere. Proper setup ensures seamless operation of all smart features.

Advanced Features and Customization
The Honeywell T6 thermostat offers advanced features like app control via Honeywell Home, smart home integration, and customizable settings for optimal comfort and energy efficiency;
Using the Honeywell Home App for Remote Control
The Honeywell Home app allows seamless control of the T6 thermostat from anywhere. Users can adjust temperatures, view schedules, and receive notifications. The app also supports geofencing, automatically optimizing settings based on the user’s location. Additionally, energy usage reports provide insights to help reduce consumption. The app is available for both iOS and Android devices, ensuring compatibility across various platforms. Remote access offers convenience and peace of mind, enabling users to manage their home’s comfort settings effortlessly. By integrating with smart home systems, the T6 thermostat enhances overall home automation, making it a versatile and modern solution for temperature control.
Integrating with Smart Home Systems
The T6 thermostat seamlessly integrates with various smart home systems, enhancing your home’s automation capabilities. Compatibility with platforms like Apple HomeKit and Amazon Alexa allows voice control and synchronized system operations. Users can incorporate the T6 into custom scenes and routines, ensuring a unified smart home experience. Additionally, the thermostat supports Z-Wave technology, enabling integration with other Z-Wave compatible devices. This connectivity allows for advanced automation, such as adjusting temperatures based on other smart devices’ statuses. The Honeywell Home app facilitates easy setup and management of these integrations, providing a centralized control hub. By integrating the T6 with your smart home system, you can achieve greater convenience, energy efficiency, and overall home comfort.
Adjusting System Changeover and Differential Settings
Adjusting the system changeover and differential settings on the T6 thermostat allows for precise control over your HVAC system’s operation. The system changeover setting determines how the thermostat switches between heating and cooling modes, with options for manual or automatic operation. Automatic changeover is typically recommended for convenience, as it enables the thermostat to switch modes based on temperature demands. The differential setting, adjustable within a range of 0 to 5 degrees Fahrenheit, dictates the temperature deviation that triggers system activation. A smaller differential ensures closer temperature control, potentially increasing system cycling, while a larger differential may reduce cycling but could lead to greater temperature fluctuations. These settings can be accessed through the Honeywell Home app under advanced features, allowing for customization to optimize comfort and energy efficiency. Proper adjustment requires consideration of personal comfort preferences, HVAC system type, and energy usage goals. Regular monitoring and seasonal adjustments may be necessary to maintain optimal performance.
Troubleshooting and Maintenance
Regular maintenance and quick troubleshooting ensure optimal T6 thermostat performance. Clean the device, check wiring, and update software to prevent issues and extend lifespan.
Common Issues During Installation
Common issues during T6 thermostat installation include incorrect wiring connections, improper mounting, and compatibility problems with existing HVAC systems. Ensuring the system is turned off and following the wiring diagram carefully can prevent these issues. Additionally, using the correct tools and materials, such as the UWP mounting system and J-box adapter, is essential for a smooth installation. If the thermostat fails to power on after installation, check the circuit breaker and ensure all connections are secure. For advanced features like Wi-Fi connectivity, ensure the device is properly paired with the Honeywell Home app. Refer to the manual for troubleshooting steps if issues persist.
Resetting the Thermostat to Factory Settings
Resetting the T6 thermostat to factory settings is a useful step when encountering installation issues or starting over. To reset, navigate to the thermostat’s menu, select “Factory Reset,” and confirm the action. This will erase all custom settings, returning the device to its default state. Ensure the thermostat is powered on and connected to your system before performing the reset. After resetting, you will need to reconfigure all settings, including time, date, and temperature schedules. For guided assistance, use the Honeywell Home app or refer to the manual. Resetting is a straightforward process but should be done carefully to avoid losing preferred configurations. If issues persist, contact Honeywell support for further assistance.
Cleaning and Maintaining the T6 Thermostat
Regular cleaning and maintenance are essential to ensure the T6 thermostat operates efficiently and accurately. Turn off the power at the circuit breaker before cleaning to avoid damage or electrical hazards. Gently wipe the thermostat’s screen and exterior with a soft, dry cloth to remove dust and fingerprints. Avoid using harsh chemicals or abrasive materials, as they may damage the display or casing. Check the sensors periodically to ensure they are free from dust or debris, which could affect temperature readings. For internal maintenance, refer to the official manual or contact Honeywell support. Cleaning should be done every 3-6 months to maintain performance. Proper upkeep ensures precise temperature control and extends the lifespan of the device.
Additional Resources and Support
Access comprehensive guides, troubleshooting tips, and customer support through Honeywell’s official website and app. The T6 manual and online forums offer detailed assistance for optimal use.

Downloading the Official T6 Thermostat Manual
The official T6 thermostat manual is readily available for download on Honeywell’s website. This comprehensive guide provides detailed instructions for installation, operation, and maintenance. It includes step-by-step diagrams and troubleshooting tips to ensure smooth setup and usage. To access the manual, visit the Honeywell Home website, navigate to the support section, and search for the T6 Pro Programmable Thermostat. Select the appropriate model and download the PDF document; The manual covers essential topics such as wiring, programming schedules, and advanced features like smart home integration. Reading the manual thoroughly is crucial for maximizing the thermostat’s efficiency and ensuring proper functionality. It also includes safety precautions and warranty information, making it an indispensable resource for both professionals and DIY installers.
Contacting Honeywell Customer Support
For assistance with the T6 thermostat, Honeywell offers comprehensive customer support. Visit their official website and navigate to the “Support” section to find contact options. You can reach their team via phone, email, or live chat. Additionally, Honeywell provides an online knowledge base with FAQs and troubleshooting guides. Registered users can access exclusive resources and priority support. Ensure to have your product serial number ready for quicker assistance. Honeywell’s customer support operates during business hours, offering help with installation, software updates, and advanced feature configurations. Their dedicated team is trained to resolve technical issues efficiently, ensuring your T6 thermostat operates optimally. For urgent issues, consider contacting a certified HVAC technician for professional assistance. Honeywell’s commitment to customer satisfaction makes their support services reliable and accessible.
Online Communities and Forums for T6 Users
Engage with online communities and forums dedicated to T6 thermostat users for troubleshooting and sharing experiences. Platforms like Honeywell’s official forums and third-party sites offer valuable insights. Participate in discussions, ask questions, and access user-generated guides. These communities are excellent for resolving common issues and learning advanced customization tips. Many forums are moderated by experts, ensuring reliable information. Users often share creative solutions and installation tips, enhancing your T6 experience. Active participation can lead to improved product understanding and optimization. These resources complement Honeywell’s official support, providing a collaborative environment for T6 users worldwide. Leverage these communities to maximize the potential of your thermostat and stay updated on the latest features and updates.